 info@allaroundtexasroofing.com
 Schedule Now
 (469) 598-0899
The roof is fixed. The rain has stopped coming through. And there, over the living room or the upstairs hallway, is a brown ring that nobody wants to look at for another week. The temptation is to grab a can of ceiling paint. That is usually the one step that brings the stain straight back, so here is the order that actually works.
TL;DR
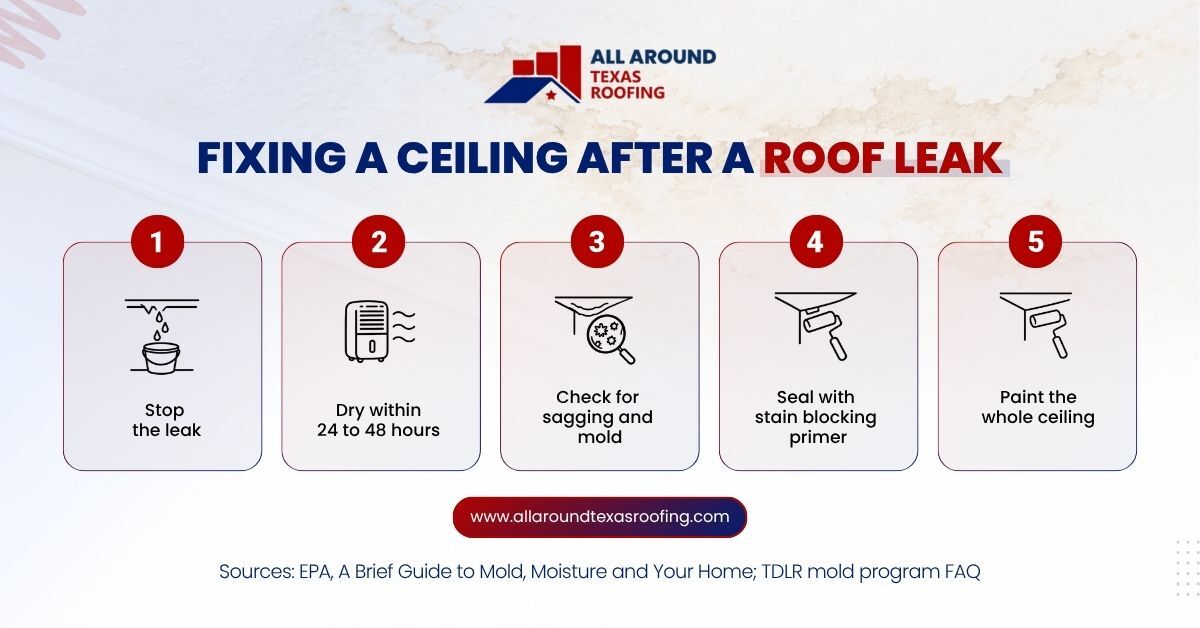
Ceiling repair after a roof leak happens in a fixed order: confirm the leak is stopped, dry the ceiling and everything above it, check for damage you cannot see, then seal the stain with a stain-blocking primer before any finish paint goes on. The Environmental Protection Agency advises drying water-damaged areas and items within 24 to 48 hours to prevent mold growth, and says not to paint or caulk moldy surfaces. Drywall that has sagged, softened, or grown mold usually has to be cut out and replaced rather than painted. Texas licenses mold remediators through TDLR, and the agency says that in most instances, visible mold under 25 contiguous square feet can be cleaned by people who are not licensed. If the leak came from storm damage, the interior repair usually belongs on the same insurance claim as the roof, so document it before anything is torn out.
First, Make Sure the Leak Is Really Stopped
Before anything happens inside, the source has to be fixed and confirmed. A ceiling repaired under an active leak is a ceiling you will repair twice.
That sounds obvious, but roof leaks are sneaky. Water enters at one point, runs along a rafter or the top of the drywall, and drips out somewhere else entirely. A stain in the middle of a bedroom ceiling may come from a pipe boot six feet uphill.
A few signs the source is not yet fixed:
- The stain grows or darkens after the next rain
- The ring has a wet center rather than a dry edge
- A new stain appears near the first one
- The attic insulation above is still damp days after the last storm
If any of those apply, the roof comes first. Proper roof leak repair starts by tracing where the water actually got in, which is not always where it came out.
Why the Stain Shows Up Where It Does
Homeowners often point at the stain and ask what is directly above it. The answer is frequently nothing at all.
Water that gets through a roof follows gravity and whatever surface it lands on. It runs down the underside of the deck, along a rafter or truss, across the top of a ceiling joist, and soaks into the insulation. It finally shows on the ceiling wherever it pools or finds a seam, a light fixture, or a vent opening.
That is why the stain’s location is a clue, not an answer. On most North Texas houses, the usual suspects above a ceiling stain are:
| Stain location | Common source uphill |
|---|---|
| Near an exterior wall | Flashing where the roof meets a wall, or the roof edge |
| Around a bathroom or kitchen fan | The roof vent or its seal above |
| Below a chimney | Chimney flashing or crown |
| In the middle of a room | A pipe boot, vent, or nail pop further up the slope |
| Along a line across the ceiling | Water running along a framing member |
Light fixtures and fans in a wet ceiling
Water and wiring do not mix. If the stain is around a light fixture, a ceiling fan, or a smoke detector, switch off the breaker for that circuit before touching anything, and leave it off until the area is dry and an electrician has looked at the fixture if water reached it. A dripping light fixture is a reason to cut the power first and ask questions afterwards.
How Long Does a Wet Ceiling Take to Dry?
A wet ceiling should be dried as quickly as possible, and the EPA’s target is within 24 to 48 hours of the leak. The EPA’s brief guide to mold, moisture and your home says it is important to dry water-damaged areas and items within that window to prevent mold growth, and that if damp materials are dried within 24 to 48 hours, in most cases mold will not grow.
In practice, drying a ceiling means drying three things, not one:
- The drywall itself
- The insulation sitting on top of it in the attic
- The framing and deck the water ran along on the way down
Wet insulation is the one people forget. Batts and blown insulation hold water against the top of the drywall for days. If the insulation above the stain is soaked, it usually needs to be pulled back or replaced so the ceiling underneath can dry.
Fans, dehumidifiers, and running the air conditioning all help. In a North Texas summer, the air conditioning alone pulls a surprising amount of moisture out of a room. In the cooler, damper months, it takes longer.
Why you should wait before painting
Paint seals the surface. Anything still wet behind it stays wet, and the water keeps carrying the brown tannins and minerals from the stain toward the surface. That is why a stain painted over too soon often shows back through within days.
The EPA puts it plainly for moldy surfaces: do not paint or caulk them; clean and dry first, and paint applied over moldy surfaces is likely to peel.
When Drywall Has to Come Out
Not every water-stained ceiling needs new drywall. Many only need drying, sealing, and paint. The drywall has to come out when the water has changed the board itself.
| What you find | What it usually means | Usual fix |
|---|---|---|
| A dry stain, board firm and flat | Cosmetic only | Seal with stain-blocking primer, then paint |
| Board sagging between joists | Gypsum core softened by water | Cut out and replace the section |
| Soft or crumbly when pressed | Core has broken down | Cut out and replace |
| Paper facing peeling or bubbled | Facing separated from the core | Usually cut out and replace |
| Visible mold growth | Water sat too long | Remove and replace, following mold guidance |
| Seams or tape lifting | Joint compound softened | Retape and refinish the joints |
A sagging ceiling deserves care. It can hold a surprising amount of water, and it can come down without warning. Keep people and furniture out from under it until someone has looked at it.
Ceiling tiles are different
In rooms with a drop ceiling, such as a finished garage or a home office, stained tiles are the easy case. The EPA notes that absorbent or porous materials such as ceiling tiles may have to be thrown away if they become moldy, and a tile is cheap to replace. Match the tile type so the new one does not stand out.
Stain Blocking Primer and Why Ordinary Paint Fails
The single most important product in a water stain repair is not the paint. It is the primer underneath it.
Water stains carry dissolved material out of the wood, drywall paper, and dust in the attic. Ordinary ceiling paint is water-based and lets that material bleed right through it, sometimes as soon as it dries. A stain-blocking primer is formulated to seal the stain in so it cannot migrate into the topcoat.
The usual sequence looks like this:
- Confirm the area is fully dry.
- Clean the surface of dust and any residue.
- Apply a stain-blocking primer over the stain and a little beyond it.
- Let it cure according to the product label.
- Apply ceiling paint to the whole ceiling plane, not just the spot.
That last step matters more than people expect. A patch of fresh paint on a ceiling that has yellowed slightly over the years stands out as clearly as the stain did. Painting the full ceiling, corner to corner, hides the repair.
This is the kind of interior work our painting crew handles. The water damage stain blocking and interior painting on our painting services page cover exactly this finish work once the roof above is sound.
Matching a Textured Ceiling
Many North Texas homes have textured ceilings rather than smooth ones: knockdown in a lot of newer builds, popcorn in some older ones. A repair that replaces a section of drywall has to be textured to match before primer and paint, or the patch will show from across the room no matter how well it is painted.
Matching texture is a skill of its own. A few points worth knowing before the work starts:
- Knockdown is applied wet and flattened as it sets, so matching it takes practice on a scrap board first
- A small patch is easier to hide near the edge of a room than in the middle
- Texture has to dry fully before primer, which adds a day to the job
- On an older popcorn ceiling, do not scrape or sand until the material has been tested, because older textures can contain materials that should not be disturbed without precautions
When the patch is textured, primed, and the whole ceiling plane is repainted, a good repair should be hard to find.
Mold: When It Becomes a Job for Someone Else
Most ceiling stains from a single roof leak, caught quickly and dried properly, never grow mold. When the water sat for days, or the leak was slow and hidden, it is a different story.
The EPA’s guidance on mold cleanup in your home says that if the moldy area is less than about 10 square feet, in most cases you can handle the job yourself, and that larger areas or a lot of water damage call for its more detailed remediation guidance or an experienced contractor.
Texas adds its own rules. The Texas Department of Licensing and Regulation licenses mold assessors and remediators, and its mold program FAQ says that in most instances, areas of visible mold of less than 25 contiguous square feet can be cleaned up by people who are not licensed. The same FAQ notes exemptions for buildings with fewer than 10 rental units, including houses, and for owners doing their own remediation in some circumstances.
| Situation | Who usually handles it |
|---|---|
| Stain only, no mold, dried quickly | A painter, after drying |
| Small patch of mold under about 10 square feet | Often the homeowner, following EPA guidance |
| Larger mold growth or hidden mold behind drywall | A qualified mold professional |
| Water from sewage or contaminated sources | A professional, per EPA guidance |
If anyone in the house has health concerns, the EPA’s advice is to talk to a health professional before starting cleanup.
Interior Damage on the Insurance Claim
If the leak came from storm damage, the stained ceiling is usually part of the same loss as the roof. That makes documentation before repair important.
The Texas Department of Insurance’s homeowners insurance guide tells policyholders to make only temporary repairs to protect the house and belongings, and not to make permanent repairs before the insurer sees the damage, because the claim could be denied.
For a ceiling, that means:
- Photograph the stain, any sagging, and the attic above, with the date
- Keep any drywall or insulation that has to come out for safety, or photograph it thoroughly before disposal
- Dry the area, because drying is protection rather than a permanent repair
- Hold off on primer and paint until the adjuster has seen it, or has told you in writing to proceed
Our post on how to document roof damage covers the photo side in detail.
Fix the Roof, Then the Room, With One Call
We fix roof leaks across Collin County and Denton County, from Frisco and McKinney to Melissa, Anna, and Little Elm, and we handle the interior painting afterwards so you are not coordinating two companies for one leak. The order never changes: stop the water, dry everything, check for damage, seal, then paint.
If you are in Melissa, our Melissa roofing page covers local details.